Diamonds in the Rough: Animation Clean-Up
June 6th, 2011
Written By: Richard Suh
Hi, I’m Richard Suh, and I’m the lead clean-up artist for Skullgirls. Last week, we gave you a peek into our animation production process via a short documentary video, so I wanted to elaborate on the clean-up process mentioned in it.
Like any animation company, streamlining our work is a top priority and essential to getting things done in a timely manner. Pretty much all of our animators are fully capable of cleaning up the things that they have roughly animated, but under the constraint of time, it’s easier for a specialist to do it in their stead. That’s where the clean-up artist comes in: given the time and training, clean-up artists can clean frames very quickly and efficiently, leaving the animators to focus more of their time on animating.
A lot of people have asked, “What does it mean to clean-up an animation for Skullgirls?” Well, I’m here to answer this question.
There are 3 specific steps to our clean up process: 1) Cleaning up the line art, 2) Adding the shading, and 3) Filling in the colors.
Step 1: Cleaning Up the Line Art
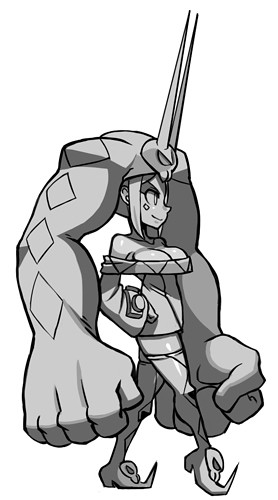
An animation frame that the animator passes off to the clean-up artist will generally look like this:
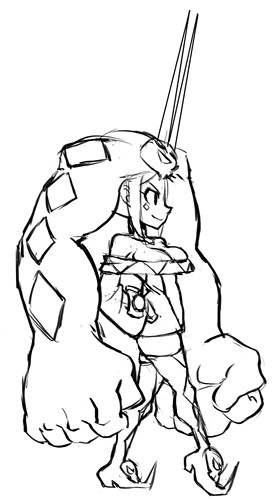
This animation frame has all the basic structure of the character’s anatomy as well as the rough details of her outfit. The clean-up artist then takes rough, sketchy frames like these and solidifies the lines, producing something like this:
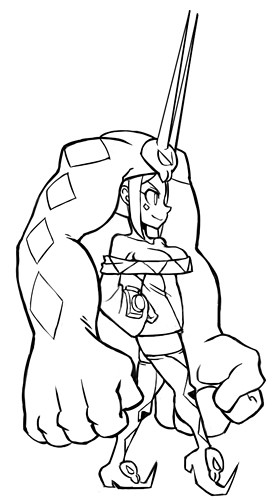
Note that the line weights vary across different sections of the line art.
Alex, our art director, has a particular line art style that emphasizes form and depth through the thickness of lines. Whereas many animation studios keep line art uniform throughout their animations, we go the extra step of adding line weights to give each frame a near illustration quality. This attention to detail is the standard to which we hold all of our clean-up artists.
Step 2: Adding the Shading
The next step is the creation of the shading layer.
The shading layer uses about 5 different shades of grey over the lineart.
Again, the shades must emphasize the form.
You can see that the back hat arm is shaded more darkly compared to the front hat arm. This is because we are trying to denote the characters presence in a more three dimensional space – without the luxury of a 3D model, we employ all types of artful techniques to emulate depth, creating a more pleasing look.
Step 3: Filling in the Colors
Finally, there’s the color layer.
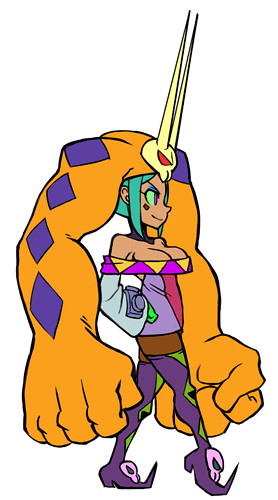
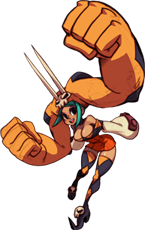
You’ll see that a lot of these colors don’t match the original character design. That’s because these colors are placeholder colors for the different sections of her outfit. In effect, we’re using false colors to section her, and then the engine fills those in with the real colors. For example, her neon green hand and pink shoe skulls are vibrant to distinguish themselves from the other sections of her outfit, making it easier to color tell them apart when creating final palettes.
So there you have it. This process is applied to every frame of animation, and then the completed assets are passed on to the design staff for integration in the game.
Putting it all Together
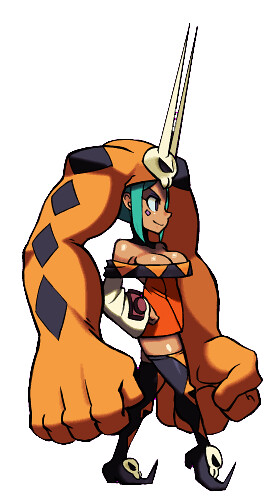
Now a lot of people who have seen the shade layer and color layer wonder how these two layers come together to make the characters look as great as they do in-game. A popular line of thought is that the shade layer is a simple multiply layer on top of the color layer, like this:

However, any high school art teacher will tell you that shading with grey leaves an image looking muddy and dull. Instead, we use a custom shader to combine these two layers programmatically to create a final image with a more illustrated look:
So there you have it: our clean up process in a nutshell.
If you’re interested in applying for a clean up position, check out the Reverge Labs job page.
Thanks for reading!